The funny thing about creative projects is it’s very easy to do one of two tings: Jump right into creating something or feel overwhelmed by the blank page in front of you. The problem with both of these scenarios is there is no planning involved. And as we learned in our Pre-Production class, lack of planning costs more time, money and includes more roadblocks.
That’s why when I sat down to work on my latest Post-Production assignment, an animated infographic, I decided I was going to invest in the pre-production process before jumping into creating it. And it really made things go smoothly, and I’m very pleased with the outcome.
Everyone has a different process, but I thought I’d share what I’ve learned about the planning process through completing my assignments.
Step 1: Understand the concept and choose a topic
We were given an assignment to create an animated infographic based on a topic we chose. An infographic is a visual way to represent information. I began planning for my project by watching several animated infographics to get a better understanding of what they were and get some ideas. I chose to create a self-promotional infographic. I thought it would serve a dual purpose of showing future employers I could make a video like this and also present information about myself.
Step 2: Gather, Group and Organize the Facts
Now that I knew what an animated infographic was and had a topic to pursue, it was time to gather the facts. I tried to quantify facts about myself since much of the infographics I saw included lots of statistics. I wrote down how many blogs I’ve written, how many social media accounts I’ve managed, years of experience I had in certain fields and more. I then took my long list of facts and grouped them into categories and put those categories into an order that seemed logical to me. In the margins I made a few notes and thumbnail drawings of the images and animations I thought I might use.
Step 3: Storyboard the video and choose a visual theme
At this point I was feeling very good about the project. Ideas were coming to me, and I could see it staring to form in my head. I drew a storyboard in my notebook of the different panels I would create. I jotted notes on the animations I would use to move from panel to panel. I chose a color scheme and the fonts for the video.
Step 4: Create the Graphics
Based on the storyboard, I knew what graphics I was going to create. Some of my graphics I was going to need to create in Photoshop before working in After Effects, where the video would be put together. This step was very helpful. If I had jumped right into working in After Effects, I would have been jumping between After Effects and Photoshop, creating the graphic once I got to that part in the video. While this would have worked just fine I assume, the workflow went much smoother.
I should also mention that this is when I created a folder specifically for this project. All my files went into this folder. That way, I wouldn’t have trouble finding where my files were and if I needed to move the project to another computer or storage device, it would be very simple to do so.
Step 5: Create the Video
When I opened a new project in After Effects, I imported the graphics I made in Photoshop. I followed the storyboard I made earlier. I made a few changes as I began to put it together, but there really wasn’t much trial and error like you have when you jump right into making something without planning.
Even though this project was complicated, by researching and planning I didn’t feel overwhelmed. There was no staring at a blank project, getting stuck part way through making the video or starting over because I didn’t like what I made. I think I ended up with a video that is well thought out and has a consistent look. I’m glad I invested in the planning process.
How do you plan creative projects? Please share your tips and thoughts in the comments.

Showing posts with label Post-Production. Show all posts
Showing posts with label Post-Production. Show all posts
Saturday, December 6, 2014

Thursday, September 18, 2014
Mud, Camera… Action!
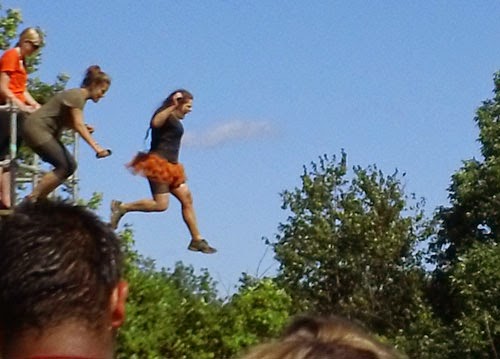 |
| My friends participating in a Tough Mudder jump |
I saw several participants with GoPro cameras attached to their heads. No doubt they were going to share footage from these small, HD cameras on an online platform such as YouTube or Vimeo. I think that’s pretty cool, especially since I would never participate in such an extreme event, to see what it’s like to complete these mud-covered obstacles from their point of view.
 |
| I spot some GoPros! |
In my Post-Production class, we’re learning how to work in 3-D space in Adobe After Effects. You can create layers, say, with city skylines, and zoom through the space between them. You can also take flat images, give them depth and animate them. I’m working on a project with an After Effects icon I built in the program for practice. It’s really awesome to picture something in your head and create it in a program exactly how you imagined it.
Speaking of brining a concept to reality, we’re learning the beginning stages of how to do just that in my Pre-Production class: Taking an idea and turning it into something visual. During our last meeting, we looked at commercial scripts and learned how to line them. This is what you do to plan what shots you need. From that, you can build a storyboard. Our assignment this week requires us to do these activities on our own.
Between homework, classes, the internship and work, I’m trying to get some friends together to play disc golf at the West Bend campus. I played for the first time last year and it was a blast. I figured we should do it now while the weather is good enough to enjoy being outside. Let’s hope I can squeeze it in soon because it looks like Mother Nature might race through the fall season.
Sunday, August 31, 2014
The Bread of Video-Making

It is my busiest semester and it’s also my last semester at MPTC. While I am not a full time student, I am taking two 3-credit classes this semester on top of my full time job and an internship.
Yes, I just mentioned I have an internship this semester! I will be working and learning at WBCTV. I haven’t started yet, but I think it’s going to be a wonderful learning experience that will help me reach my career goals. I will be working with professionals and professional equipment. My instructors are always looking for ways for students to get real-world experience, so I very much appreciate my instructor brining this opportunity to my attention. Thank you!
After attending the first week of class, I can see there is still much to learn in the classroom about making videos in addition to what I have learned already and will be bringing to my internship. I am taking both Pre-Production and Post-Production, which I refer to as the “bread” of the video-making process (with production – the actual filming – as the meat).
Pre-Production is the planning part. We only had an overview of what pre-production is in class, but from what I remember this includes the script, storyboard, delegating roles and responsibilities of crew members, equipment needed and deciding what you may need to create in post-production for effects. I’m sure there is even more to it than that, and I will have the rest of the semester to learn more.
Post-Production is the editing part of video-making, to put it simply. It includes sound and video editing, title sequences, special effects, sound effects and touching up errors that may have occurred during filming. Your job in post-production is to mesh everything together into one cohesive story. As I learn more, I’ll be sure to share my class experiences with you. I’ll also be sharing my internship experience, and whatever else this semester brings, in my blog. Keep reading to find out what happens next in the story of my life, my future and my MPTC.
Subscribe to:
Posts (Atom)